[Zephyr on ESP32] : Setup and blinking things
Introduction
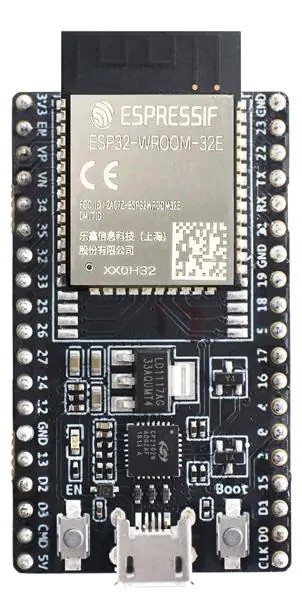
This summer, I am trying to learn Zephyr after being talked a lot about it by Anuj. As a concept, it is an RTOS for embedded electronics. I know FreeRTOS is there, but FreeRTOS is not really an RTOS, it is a task scheduler. Zephyr is much more than that. I do not know much at the moment too. But, it seems interesting. In this blog series I will document the tiny steps I took in August of 2024 to get it running on a basic ESP32 kit (WROOM- DEVKITC) that can be had for around 6 EUR.
Why Zephyr?
Zephyr is interesting as it separates the application code and device configs. So, you have a logic in a file and it can be applied (more or less) to the supported boards.
I learned a new term as well, Board bring up. It means making sure that the current board (dev or product) is compatible with the toolchain being used with all peripherals mapped and funcional.
Why am I learning it?
I am a creative technologist and my work is to be jack of all trades and master of none. But lately, I have been struggling to get deeper in electronics (especially IoT) where clients accept more robust code and manageable prototypes that can be taken into production faster than Arduino prototypes. I would make an Arduino prototype and prove the concept, but then, in most cases the client will have to squash all of it (except my state diagram and Physical UX guidelines), and start from scratch on a more production grade MCU like ESP32 etc. So, I want to help clients deliver something more closer to production. My main job still remains
- designing Physical UX,
- prototyping device concepts,
- integrating ideas with the ID (Industrial design) team,
- making physical prototypes,
- testing it with users
- making digital MVPs in React (also sometimes React Native),
- and then doing usability tests and launching them in the world.
My current job is mostly planning and digital prototyping. But, Physical UX has always been my passion, having done that in across various industries.
The summer quest here is to make an AWS IoT core/mqtt connected ESP32 that listens to some commands and executes instructions. I have already done that using the Arduino toolchain.
How am I learning?
I am using Claude as my AI companion, this YouTube tutorial series, and if I get stuck I am grateful that I can book some time with Anuj as he is an expert at this.
Setting things up on the Mac
In case things get updated and versions change, the official zephyr instructions are here. Also, make sure you have homebrew installed.
Set up the development environment:
brew install cmake ninja gperf python3 ccache qemu dtc libmagic wget openocd
Create Zephyr workspace and set up virtual environment: It is good to have a virtual environment. We need it to setup West, which is Zephyr's meta tool. It is like avrdude for AVR or esp-tool for ESP8266/32.
mkdir ~/zephyrproject && cd ~/zephyrproject
python3 -m venv zephyr-venv
source zephyr-venv/bin/activate
Install West and Zephyr dependencies:
pip install west
west init -m https://github.com/zephyrproject-rtos/zephyr --mr main
west update
west zephyr-export
pip install -r ~/zephyrproject/zephyr/scripts/requirements.txt
Install Zephyr SDK: Be careful here to choose your OS and if you are on Apple silicon be sure to replace x86_64 with aarch64. Otherwise, down the line you might be wondering what is wrong. The latest version is 0.16.8
cd ~
wget https://github.com/zephyrproject-rtos/sdk-ng/releases/download/v0.16.8/zephyr-sdk-0.16.8_macos-aarch64.tar.gz
tar xvf zephyr-sdk-0.16.8_macos-aarch64.tar.gz
cd zephyr-sdk-0.16.8
./setup.sh
Set up environment variables:
export ZEPHYR_SDK_INSTALL_DIR=~/zephyr-sdk-0.16.8
export ZEPHYR_BASE=~/zephyrproject/zephyr
That should make sure we have a good base to get up and running. Do not be tempted to run the blinky sample. It wont likely work.
Create a new project (you can make it anywhere):
mkdir ~/hello && cd ~/hello
mkdir src
Set up project files (CMakeLists.txt, prj.conf, and src/main.c)
Directory Structure
~/
├── zephyrproject/
│   ├── zephyr/
│   └── zephyr-venv/
└── hello/
    ├── CMakeLists.txt
    ├── prj.conf
    └── src/
        └── main.c
File Contents
CMakeLists.txt
cmake_minimum_required(VERSION 3.22)
set(BOARD esp32)
find_package(Zephyr REQUIRED HINTS $ENV{ZEPHYR_BASE})
project (hello)

target_sources(app PRIVATE src/main.c)
prj.conf
It can also be just empty at this stage
CONFIG_GPIO=y
src/main.c
#include <zephyr/kernel.h>
#include <zephyr/device.h>
#include <zephyr/drivers/gpio.h>

static const struct device *gpio_ct_dev=
	DEVICE_DT_GET(DT_NODELABEL(gpio0));

void main(void)
{
if(!device_is_ready(gpio_ct_dev))
{
return;
}

int ret;
ret= gpio_pin_configure(gpio_ct_dev, 25, GPIO_OUTPUT_ACTIVE);

if(ret!=0)
{
return;
}
while(true)
{
ret = gpio_pin_set_raw(gpio_ct_dev,25,1);
if(ret!=0)
{
return;
}
k_msleep(500);

ret = gpio_pin_set_raw(gpio_ct_dev,25,0);
if(ret!=0)
{
return;
}
k_msleep(500);

}
}
Code Explanation
Here is a code summary. It not very technical but based on analogies to Arduino code. For a great technical explanation check out the YouTube series I mentioned above.
Include statements:
#include <zephyr/kernel.h>
#include <zephyr/device.h>
#include <zephyr/drivers/gpio.h>
This is similar to Arduino's
#includestatements. They bring in necessary libraries for Zephyr's core functions, device management, and GPIO operations.Device setup:
static const struct device *gpio_ct_dev = DEVICE_DT_GET(DT_NODELABEL(gpio0));
This is roughly equivalent to Arduino's pin setup. It's getting a reference to the GPIO device. In Arduino, you don't need to do this explicitly because it's handled behind the scenes. This is similar to checking the board files to figure out what physical pin in connected to what number.
gpio0is the node label for the first 33 pins and the remaining are ongpio1.Main function:
void main(void)
This is similar to Arduino's
void setup()andvoid loop()combined. In Zephyr, you have onemain()function that handles both initialization and the main loop.Device ready check:
if(!device_is_ready(gpio_ct_dev))
{
    return;
}
This doesn't have a direct Arduino equivalent. It's checking if the GPIO device is ready to use. In Arduino, this is assumed to be always true. Since, Zephyr is a RTOS, we need to check if the resource is available to use. The processor could be doing something else too.
Pin configuration:
int ret;
ret = gpio_pin_configure(gpio_ct_dev, 25, GPIO_OUTPUT_ACTIVE);
This is similar to Arduino's
pinMode(pin, OUTPUT). It's setting pin 25 as an output pin.Error checking:
if(ret != 0)
{
    return;
}
Zephyr uses return values for error checking. In Arduino, such explicit error checking is less common.
Main loop:
while(true)
{
    // Loop content
}
This is equivalent to Arduino's
void loop()function. It runs continuously.Setting pin high:
ret = gpio_pin_set_raw(gpio_ct_dev, 25, 1);
This is like Arduino's
digitalWrite(pin, HIGH). It's setting pin 25 to high.Delay:
k_msleep(500);
This is equivalent to Arduino's
delay(500). It pauses execution for 500 milliseconds.Setting pin low:
ret = gpio_pin_set_raw(gpio_ct_dev, 25, 0);
This is like Arduino's
digitalWrite(pin, LOW). It's setting pin 25 to low.
This code essentially creates the same behavior as a basic Arduino LED blink sketch, but with Zephyr's more robust, RTOS-oriented approach to embedded programming.
Build the project:
west build -p auto -b esp32_devkitc_wroom .
Flash the project:
west flashMonitor the logs
west espressif monitor
That is it. You should get an LED blinking on Pin 25. and you should see Zephyr boot on your terminal.

Common problems
- Path issues : Make sure you write your path files, if not check
echo $PATHto make sure Zephyr and Zephyr SDK are there. You can also dosource ~/.zshrcto make sure paths are all updated - Wrong tool chain version : They seem to change things fast and it took me 2 hours to figure out that
#include <zephyr/kernel.h>replaces#include <zephyr/zephyr> - Unsupported board : I deliberately bought the board after seeing it on the supported boards to make things easy to begin with.
- When you close the terminal, you might get west build not found : This means that the build environment has perished. We need to source it again :
source ~/zephyrproject/zephyr/zephyr-env.sh - CMake Error: The current CMakeCache.txt directory : Moved the folder? The CMake is still pointing to the old location. You might want to clear the build directory
rm -rf buildand build again.
Hope it works, Cheers! Rohit